Category: Advanced Features
Tags: 3D render, character consistency, Blender, Maya, character sheet, @character tag, photorealistic, workflow, reference images
Introduction
Have you ever created the perfect character in Blender, Maya, or another 3D software and wondered how to bring them into Dream Machine? While you can't directly import 3D model files, there's a powerful workflow that lets Dream Machine interpret your 3D renders and transform them into photorealistic or stylized characters you can use consistently across multiple scenes. This guide will show you exactly how to bridge the gap between your 3D creations and Dream Machine's AI-powered video generation.
Prerequisites: Master the Fundamentals First
Before diving into 3D character workflows, it's essential to understand the core principles of character consistency in Dream Machine. We recommend reviewing the comprehensive guide "Character Consistency Secrets" which covers three proven methods:
Prompting techniques with specific phrases
@character tag workflows
Modify Frame approaches
Check out the full guide here: Character Consistency Secrets in Dream Machine
That article includes detailed examples and shared boards you can reference to see these techniques in action.
The Reality: No Direct 3D Import (But Here's What You CAN Do)
Important: Dream Machine does not support direct import of 3D model files such as .FBX, .OBJ, .GLTF, or .BLEND files. However, this doesn't mean your 3D work goes to waste—far from it!
Dream Machine excels at interpreting your 3D character from rendered images, essentially translating your 3D model into a living, moving character within its AI-generated scenes. The interpretation process often yields surprisingly photorealistic or artistically stylized results that can enhance your original vision in unexpected ways.
The 3D-to-Dream Machine Workflow
Here's the four-step process to bring your 3D character into Dream Machine:
Step 1: Render Your 3D Character as High-Quality Images
Export your 3D character as high-resolution images from your 3D software. For best results:
Use good lighting that shows facial features clearly
Render at high resolution (at least 1080p or higher)
Consider both neutral expressions and specific emotions
Clean backgrounds work best (plain or subtle)
Step 2: Upload to Dream Machine
Upload your rendered image to Dream Machine as a reference image or start frame. This becomes the foundation for Dream Machine's interpretation.
Step 3: Let Dream Machine Interpret Your Character
Dream Machine will analyze your 3D render and create its own photorealistic or stylized (depending on your prompt) version of that character. This is where the magic happens—your 3D model transforms into a character that can move, emote, and exist within Dream Machine's generated environments.
Step 4: Use as Reference for Future Scenes
Once you have that initial Dream Machine interpretation, save it! This becomes your consistent character reference for all future generations using the methods from the Character Consistency Secrets guide.
Example Results
View a full example board showing the 3D-to-Dream Machine workflow in action: https://dream-machine.lumalabs.ai/share/board/eb0af05f-aef6-4197-8573-9d1960ed4bcd

(Above image: Thanks to World Of KR/RiftVerse - Original Screen Capture/3D Reference)

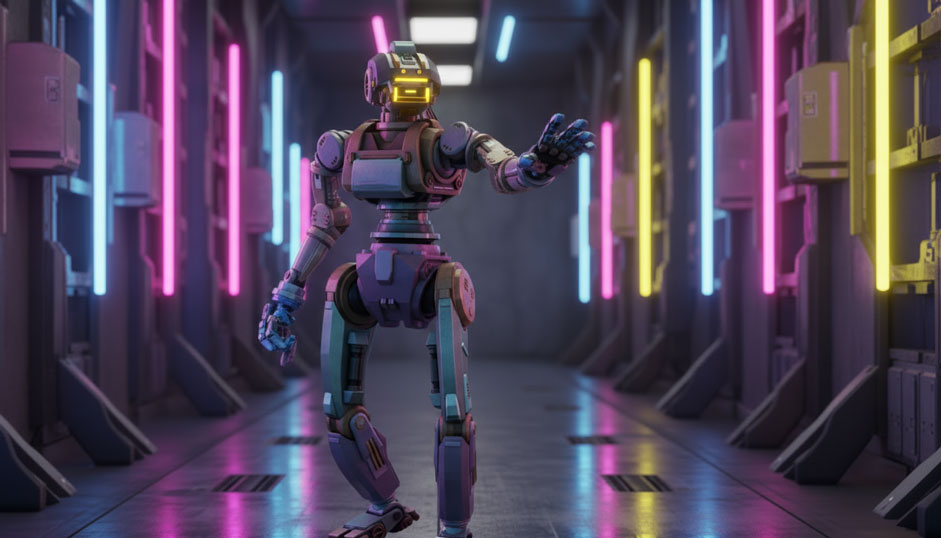
The realistic images of the robot were generated with Image V2 in Dream Machine.
This demonstrates how a 3D character created in modeling software was interpreted by Dream Machine to create a real-life version.
Creating a Comprehensive Character Sheet
Once you have your initial Dream Machine interpretation, take it a step further by creating a comprehensive character sheet. This is especially valuable for maintaining consistency across multiple scenes and camera angles.
Your character sheet should include:
Front view - Face and body straight-on
Left side profile - Shows one side clearly
Right side profile - Shows the other side clearly
Back view - Important for scenes where they turn around
Isometric view - Angled perspective showing dimension
Pro Tip: It is sometimes easier to make on image of each angle first, then simply cut them together with an image editor, and use that page as the character reference/sheet.
Why create a character sheet? The Dream Machine model may need these multiple angles as either a "refresher" when generating new scenes, or simply as additional reference material. Having 2-3 different angle images available gives you more flexibility and helps maintain consistency, especially for complex camera movements or varying perspectives.
You can generate these different angles by prompting Dream Machine to show your character from different viewpoints, then save each angle as part of your reference library.
Combining Methods for Best Results
Once you have your 3D character successfully interpreted by Dream Machine, you can employ any combination of consistency methods:
Method 1 (Prompting): Add phrases like "keep the character's face / hair / expression / features the same" to your prompts
Method 2 (@Character Tag): Use "@character" in your prompts to ensure the AI focuses on keeping them consistent
Method 3 (Modify Frame): Use the Modify Frame tool to change outfits, backgrounds, or expressions while maintaining the same face and features
Experiment with combining these approaches for the most reliable character consistency across your entire project.
Settings Recommendations
For interpreting 3D characters, these settings typically work well:
Model: Ray3
Resolution: 720p or higher
HDR: ON (helps with lighting and detail)
Aspect Ratio: 16:9 (or your preferred format)
Duration: 5 seconds (standard)
Troubleshooting
What happens if my Dream Machine interpretation doesn't look like my 3D render?: AI interpretation means your character may not look exactly like the 3D render—and that's okay! Many professional creators embrace these variations as creative inspiration. If the first interpretation doesn't match your vision, try rendering your 3D character with different lighting or angles and upload again until you get a version you're satisfied with.
Why does my character look different in each new generation?: You need to establish and use proper character consistency techniques. After getting your first successful interpretation, save it as your reference and then use the methods from the Character Consistency Secrets guide: add specific prompting phrases, use the @character tag, create a multi-angle character sheet, or use Modify Frame to maintain features across scenes.
My 3D character's details aren't coming through clearly...: Ensure your render uses strong, clear lighting that shows facial features and important details. Render at high resolution (1080p minimum) and use clean or subtle backgrounds. High-quality input images produce better Dream Machine interpretations.
Which angles should I prioritize when creating my character sheet?: Start with front view, left profile, and right profile as your core three angles. These give Dream Machine enough perspective reference for most scenes. Add back view and isometric view if your project involves complex camera movements or 360-degree character presentations.
Frequently Asked Questions (FAQs)
1. Can I upload .FBX, .OBJ, or other 3D model files directly to Dream Machine?No, Dream Machine does not support direct import of 3D model files. You must first render your 3D character as a 2D image (PNG, JPG) from your 3D software, then upload that rendered image to Dream Machine.
2. Will my Dream Machine character look exactly like my 3D render? Not necessarily. Dream Machine interprets your 3D render and creates its own version, which may vary from the original. This interpretation can be photorealistic or stylized depending on your prompt. Many creators find these variations creatively inspiring, and the key is to save the interpretation you like as your ongoing reference.
3. What's the best way to maintain my 3D character's appearance across multiple videos? Create a character sheet with multiple angles (front, side profiles, back, isometric), then use the character consistency methods: add "keep the character's face the same" to prompts, use the @character tag, and leverage Modify Frame for outfit or background changes while preserving facial features.
4. What resolution should I render my 3D character for best results? Render at least 1080p or higher with good lighting that clearly shows facial features. Use clean or subtle backgrounds, and consider rendering both neutral expressions and specific emotions to give yourself multiple reference options.
5. Can I use this workflow with stylized or non-realistic 3D characters? Yes! Dream Machine can interpret both realistic and stylized 3D renders. Your prompt will influence whether the output leans photorealistic or maintains a stylized aesthetic. Experiment with different prompt phrasing to achieve your desired look.
Related Articles
Original Author: Chris Roebuck, Luma AI – Customer Support - Education
Original Creation Date: Tue, 14 Oct 2025 at 3:32 PM
Updated by: KB Conversion Team
Was this article helpful?
That’s Great!
Thank you for your feedback
Sorry! We couldn't be helpful
Thank you for your feedback
Feedback sent
We appreciate your effort and will try to fix the article