Category: Advanced Features
Tags: puppet animation, puppet creation, hand puppet, Ray3 Modify, Ray3.14, character animation, hand controls, claymation, animation styles
Introduction
Ray3 Modify and the newer Ray3.14 Modify unlock an extraordinary capability: transforming simple hand puppet videos into fully animated puppet characters in any style you can imagine. Whether you want to create puppets, claymation characters, or stylized humanoids, anime, cartoon animation, etc, this technique lets you control character animation using only your hand movements—no special equipment, green screens, or puppet-building required. This guide reveals the complete two-step workflow that professional creators use to bring puppet characters to life.
What You Can Create
This technique works with any character style as long as it has a mouth and you can mimic the character's shape and movement with your hand:
- Puppet characters (Kid's show aesthetic)
- Claymation puppets (stop-motion animation style)
- Stylized humanoid characters (animated people, fantasy creatures)
- Animal characters (as long as they have distinct mouth movements)
- Any artistic style (photorealistic, cartoon, illustrated, painted)
The key is matching your hand movement to the character's intended animation and shape as closely as possible.
Prerequisites: Recording Your Hand Puppet Video
Before starting the transformation workflow, record a short video of your hand performing puppet movements:
Recording Requirements
- Duration: Under 10 seconds (9-10 seconds works well)
- Background: Clean, simple, empty backgrounds preferred but not required—simple backgrounds process faster
- Hand position: Use your thumb and index/forefinger to create the mouth movement
- Sock?: A Sock over your hand can help for easier results—though this is not required
Complete Puppet Animation Workflow
Step 1: Transform Hand into Puppet Character (Modify First Frame)
1. Upload your hand puppet video to Dream Machine through the EDITOR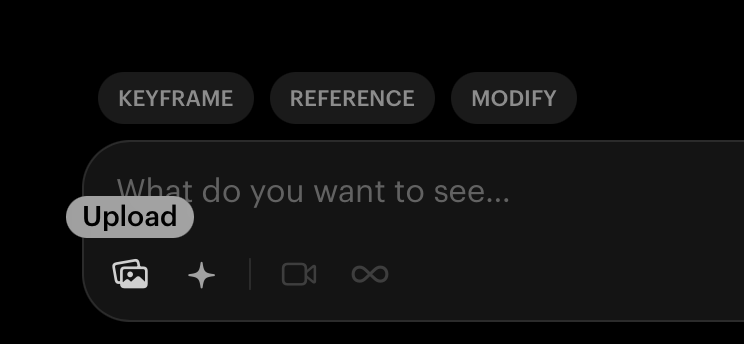
2. MODIFY to enter the Modify V2 interface - Make sure you have Ray3 or Ray3.14 selected (right)
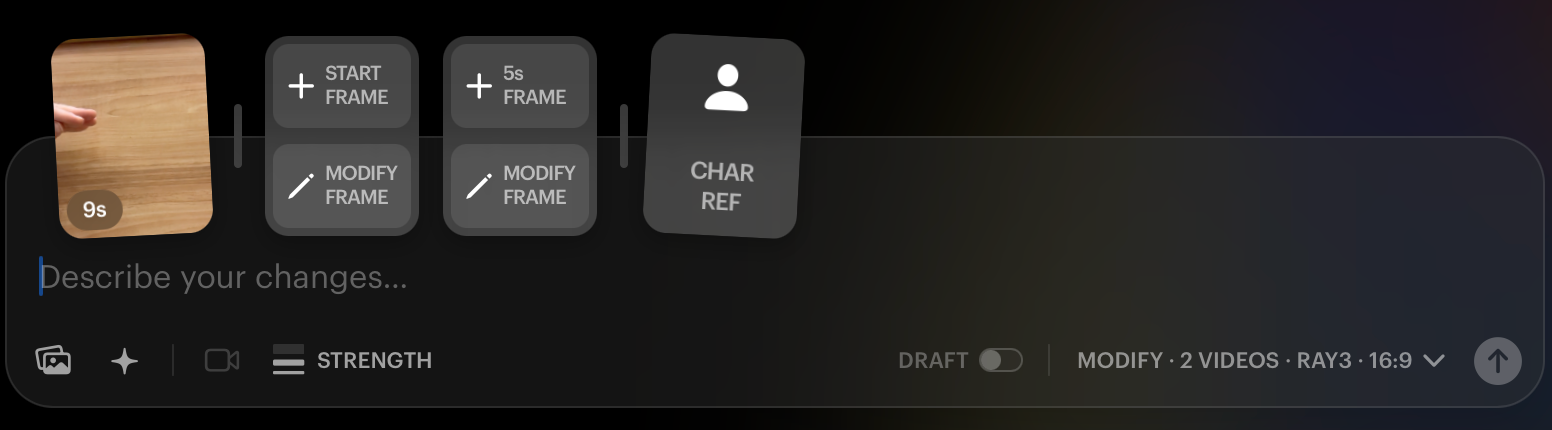
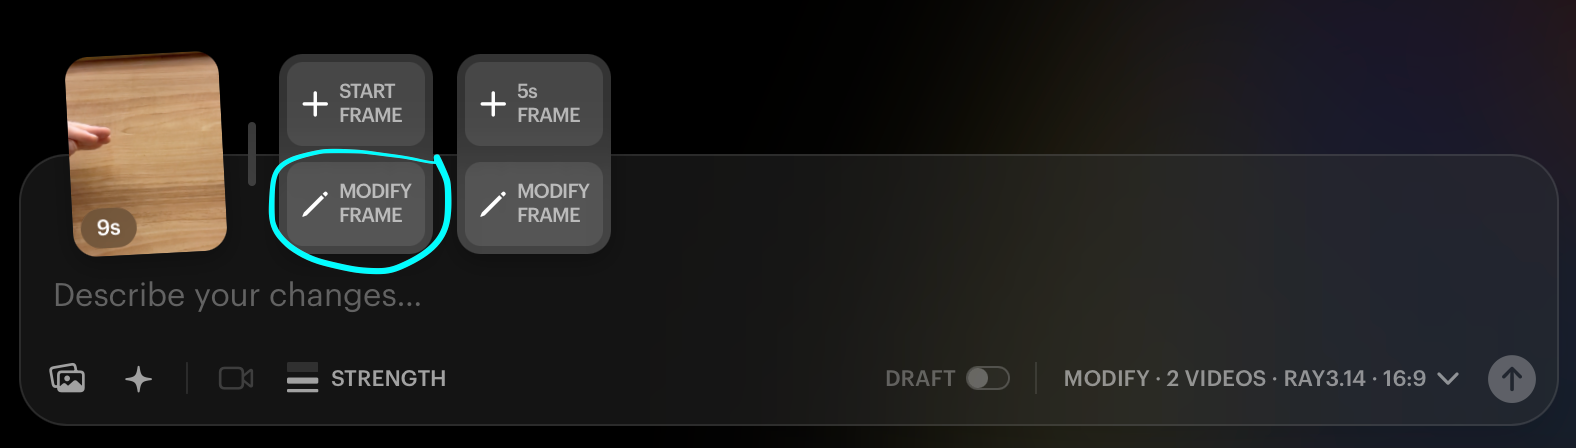
3. Select MODIFY FRAME under the "START FRAME" section (as shown in the interface screenshot)
4. Enter your character creation prompt in the text field:
Example Prompt (Female Newscaster Puppet): "A photorealistic female puppet newscaster, left side of frame. Her closed sock puppet mouth is positioned exactly at the thumb-forefinger line. Yellow sock skin, blonde hair, little sock puppet navy blazer, light blue shirt. Full news desk extends across the frame. TV studio background with screens, cameras, broadcast lighting. No human elements visible. Kids puppet show meets TV newsroom aesthetic."
Once you select the best START FRAME, simply select DONE (top right corner).
6. Configure settings:
- Model: Ray3 or Ray3.14 (Ray3.14 recommended for better results and lower credit usage)
- Resolution: 540p (saves credits while testing—you can upgrade to 720p later)
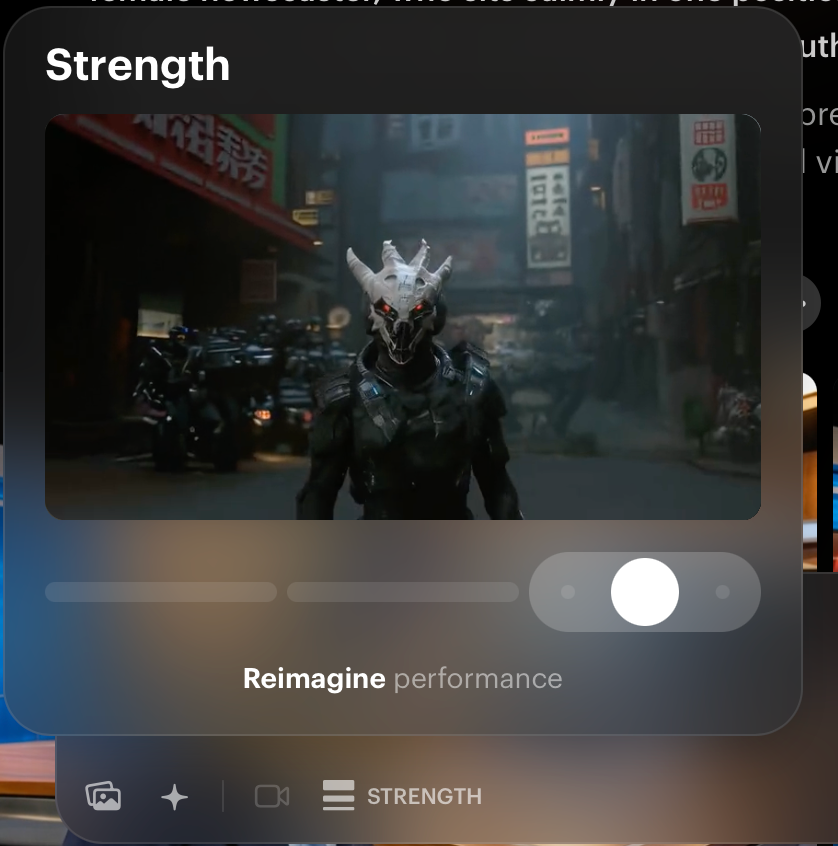
- Strength: Set to "Reimagine" level 2 (see strength slider interface)
4. Optional: Add Character Reference
- Ray3 Modify and Ray3.14 Modify allow for a Character Reference (CHAR REF)
- If you have a specific puppet or character face you want to replicate, upload it here
- If you don't have a character reference, leave CHAR REF blank and only use Modify Frame
5. Enter your Prompt
- For Relaxed/Natural Movement: "Loosely base the movements of the hand in image 2, into the talking motion of the puppet female newscaster, who sits calmly in one position. Fixed viewpoint. The @character should have the same face, same hair, same nose, same mouth throughout."
For Accurate/Precise Movement: "Exactly base the movements of the hand in image 2, into the talking motion of the puppet female newscaster, who sits calmly in one position. Fixed viewpoint. The @character should have the same face, same hair, same nose, same mouth throughout."
Important: If you over-act or make exaggerated movements with your hand puppet, use the "Loosely base" prompt for better results. The "Exactly base" prompt works best when your hand movements are already calm and controlled.
6. Hit Generate to see your animated puppet
- The result will be your fully animated puppet character moving based on your original hand movements while maintaining character consistency throughout.
Model Recommendations: Ray3 vs Ray3.14
Both Ray3 Modify and Ray3.14 Modify work for this technique, with some key differences:
Ray3 Modify:
- Excellent results with reliable puppet transformation
- Slightly higher credit usage
- Proven workflow with consistent output
Ray3.14 Modify (Recommended):
- Produces the same quality or better results
- Lower credit usage (more cost-effective)
- Newer model with improved processing
- Recommended for most users
Important: Ray2 will work, however is NOT recommended for this workflow. Use Ray3 or Ray3.14 instead.
Please Observe!:
Video 3 demonstrates what happens when extended fingers accidentally create a long nose on the puppet character—this is why folding fingers inward or using only the side of your hand is crucial for characters without prominent noses.
Pro Tip: Controlling the Nose Length
If your character doesn't have a long nose, physically fold or curl your fingers inward to shrink the "nose" profile your extended fingers create. Alternatively, use only the side of your hand rather than showing extended fingers. For accurate mouth movement (especially when mimicking audio files with speech), use only your thumb and index finger for mouth movement and avoid moving the hand sideways.
IP Moderation
Please note that you cannot recreate existing children's shows/Intellectual Property, but can create your own unique characters to animate like an original puppet show.
Character Design Tips
Mouth Positioning
Always specify where the mouth should be positioned in relation to your hand structure: "Her closed sock puppet mouth is positioned exactly at the thumb-forefinger line." This ensures the AI correctly maps your thumb-finger movement to the character's mouth.
Character Consistency
Use the @character tag and explicit consistency phrases: "The @character should have the same face, same hair, same nose, same mouth throughout." This maintains your puppet's appearance across the entire animation.
Style Specification
Be specific about the aesthetic you want: "Kids show meets TV newsroom aesthetic," "claymation style," "2D animated cartoon," "photorealistic puppet." Clear style direction helps Ray3 Modify understand your vision.
Background and Setting
Include environmental details for context: "TV studio background with screens, cameras, broadcast lighting" or "simple stage with curtains" or "outdoor park setting with trees." Setting context improves overall composition.
Troubleshooting
What happens if my puppet's nose is too long or fingers are visible?: Physically fold your fingers inward when recording the hand puppet video to minimize the nose profile. Alternatively, use only the side of your hand with thumb and index finger creating the mouth, avoiding extended fingers that create unwanted nose length.
Why does my puppet's face keep changing between frames?: Ensure you're using the @character tag and explicit consistency language: "The @character should have the same face, same hair, same nose, same mouth throughout." Also verify you're using the result from Step 1 as the basis for Step 2 rather than starting fresh.
My hand movements are too exaggerated and the result looks chaotic...: Use the "Loosely base the movements" prompt instead of "Exactly base" to give the AI flexibility in interpreting your movements. Consider re-recording your hand puppet video with calmer, more controlled movements.
The mouth movement doesn't match my hand...: In Step 1, explicitly state mouth positioning: "closed sock puppet mouth is positioned exactly at the thumb-forefinger line." Also ensure you're using only thumb and index finger for mouth control in your source video, not the entire hand.
Can I use this technique for non-humanoid characters?: Yes, as long as the character has a mouth and you can approximate its shape and movement with your hand. This works for animals, fantasy creatures, or any character with distinct mouth animation.
Frequently Asked Questions (FAQs)
1. Do I need special equipment or a green screen for this technique? No special equipment required. Record a simple hand puppet video with your phone or camera against any simple background. The magic happens entirely through Ray3 Modify or Ray3.14 Modify processing.
2. Should I use Ray3 Modify or Ray3.14 Modify? Ray3.14 Modify is recommended as it produces the same quality or better results with lower credit usage. Both work excellently, but Ray3.14 is more cost-effective and represents the latest model improvements.
3. Can I create characters in different artistic styles beyond puppets? Absolutely. This technique works for claymation, 2D animation, photorealistic puppets, illustrated styles, painted aesthetics, or any visual style. Just specify your desired aesthetic in the Step 1 prompt: "claymation style," "watercolor animation aesthetic," "stop-motion puppet," etc.
4. How do I get accurate lip-sync with specific audio? Use only your thumb and index finger for mouth control (no sideways hand movement) and perform your hand movements while listening to the audio you want to match. The more accurately you mimic the speech rhythm with your hand, the better the final lip-sync will be.
5. Why does Step 2 require specifying "Fixed viewpoint"? "Fixed viewpoint" ensures the camera doesn't move during animation, keeping focus on the puppet character's performance. This creates the classic puppet show aesthetic where the character performs while the camera remains stationary.
Related Articles
- [How Do I Use Ray3 Modify Effectively?]
- [What Is Ray3.14 and What Are Its Key Features?]
- [How Do I Maintain Character Consistency in Dream Machine?]
Original Author: Chris Roebuck, Luma AI – Customer Support - Education
Original Creation Date: Friday February 6th 2026
Updated by: KB Conversion Team
Was this article helpful?
That’s Great!
Thank you for your feedback
Sorry! We couldn't be helpful
Thank you for your feedback
Feedback sent
We appreciate your effort and will try to fix the article